


 |
GDI XJ 3-core radiator install |
Installation date: 7/15/00
The Jeep 4.0L engine is designed to run “hot”, about 210* F, but running too hot, like around 235*+ F can eventually cause serious damage and dramatically reduce engine life. Not to mention you could overheat and get stuck on the side of the road.
For the first five years of its life, my Jeep ran at 210* all the time, regardless of what I was doing, and it would never pass the 210* mark. But then this past summer for some reason it decided to start overheating. It never got to the point of boilover, but it ran very close to the red zone on a couple of occasions, and this was on the highway cruising at 70mph. This was enough to worry me and something had to be done.
After talking with a number of people about my cooling problems, I finally decided my thermostat was sticking and I probably needed to flush the radiator. I also found that the general consensus was that the factory plastic 1-core radiator wasn’t really up to the task of properly cooling the big 4.0L in hot climates. After hearing lots of good things about the GDI 3-core radiator, I decided to try one out and see what effect that had on my cooling situation. The GDI 3-core is available for both the closed and open cooling systems the Jeep Cherokee has used over the years so be sure you specify which system you’ve got when ordering.
|
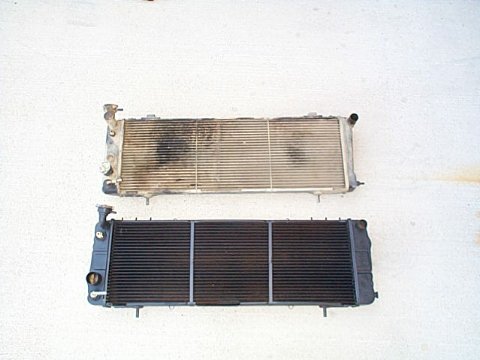
As you can see in the photo, the GDI’s side reservoirs are much larger than the factory unit’s, and the radiator itself is about half again as thick as the factory one. The radiator comes with fittings for the transmission fluid lines if you’ve got an automatic, or you can use the supplied “plugs” if you’ve got a manual tranny. |
 |
 |
The first part of the installation is to let the engine completely cool down. I’d recommend letting it cool overnight and starting the project the next morning. Once the engine has cooled you’ll need to drain the coolant from the radiator. The drain “spout” is located in the bottom left corner of the radiator when looking at it from the front. Put some tubing on the spout or position a funnel and container underneath it and loosen the spout a couple of turns, coolant should start flowing out. Remember to be careful when dealing with coolant, it can damage paint and it is very toxic to animals, which just happen to like the smell. |
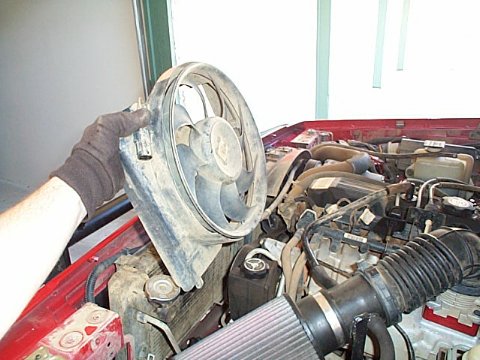
| While you’re waiting for all the coolant to drain out, start unbolting and removing the grill reinforcement panel, the radiator crossmember, the electrical fan (is you’ve got one) and the radiator fan shroud, in that order. |
 |
 |
Next you’ll need to unbolt the radiator from the AC condenser, if you’ve got AC. Also, if you’ve got the automatic transmission, you’ll need to unbolt the lower tranny line from the bottom of the radiator. |
| Once all the coolant has drained from the radiator and you’ve removed everything from around it, unclamp all the radiator hoses and transmission lines (if so equipped) and pull the radiator out. Be careful when you pull off the bottom radiator line, unless you drained the coolant from the engine block, this lower line will still have lots of coolant in it… Also, the return line for the tranny fluid is tricky to get off. It takes just the right abount of squeezing the “ears” and pulling on the line to get it off. When you look at it, you’ll see what I’m talking about. |
 |
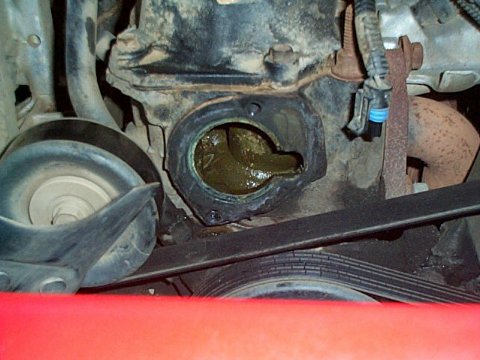 |
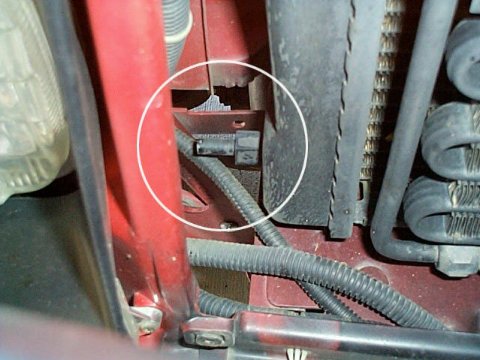
If you’re replacing your thermostat as well, go ahead and remove the radiator hose, heater hose, and temperature sensor from the thermostat housing and unbolt it from the engine. The lower housing bolt is blocked by the serpentine belt, which makes getting it out and back in a bit of a PITA. There will probably be some coolant still in the top of the engine, so be prepared when you pull off the housing and remove the old thermostat. Once you’ve removed the old thermostat, stuff a paper towel or something in the hole and scrape off all the old gasket material. |
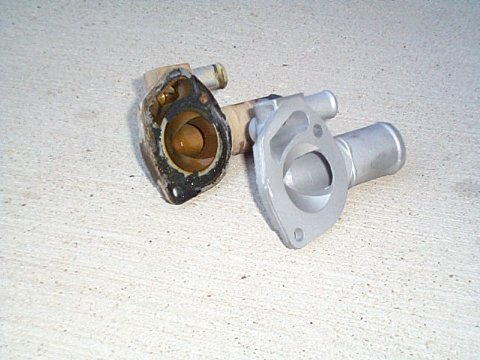
| I decided that since I was going to the trouble of installing a new thermostat, I though that I’d go ahead and replace the factory housing with a high-flow model from TurboCity. If you look at the full size version of the photo, you can see where the TurboCity housing has been ported out for higher flow. Whether this actually makes any difference is still to be debated, but I figure it couldn’t hurt. I also decided to replace the thermostat with a slightly lower temp unit to deal with the hotter weather down here in Texas. The factory thermostat is set for 195*, so I bought a 180* unit by RobertShaw. |
 |
 |
The TurboCity thermostat housing comes with a new paper gasket, and you’ll want to use some silicon gasket maker in addition to the TC gasket to get the housing to completely seal. It might also be a good idea to put a spot of silicon on the thermostat to help hold it in while you’re positioning the housing, because if the thermostat slips out of it’s seat it’s hard to tell and it could damage the housing when you tighten down the bolts. |
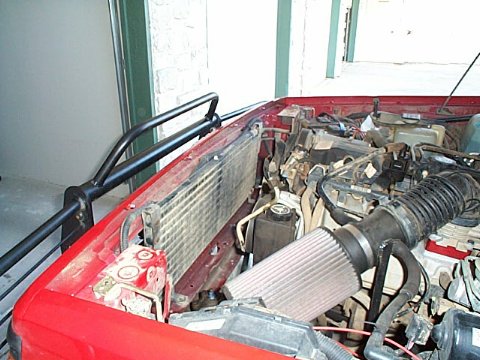
| If you’ve got the automatic transmission, install the new fittings in the radiator before setting it in the vehicle, and be sure to use teflon tape around the threads so they don’t leak. I had some clearance problems between the lower trans line (the return line) fitting and the fender, but it wasn’t anything a little work with a prybar couldn’t fix. The paper towel is stuffed in the radiator opening to keep debris from getting in during installation.
When you’re putting the new radiator in, it makes life much easier if you put the radiator fan should in before the radiator itself. |
 |
Once the radiator and fans is in place, bolt everything back down and reconnect the tranny and radiator lines. You’ll need at least a gallon of coolant to get a 50-50 mixture, so make sure you’ve got a full container or two of coolant before you start the install. After refilling the radiator, leave the cap off and run the engine until it’s reached it’s normal operating temperature, then add cooolant/water to the radiator as needed to get the system completely filled. Be sure to check for leaks. If everything looks fine and isn’t leaking you’re ready to go. I didn’t notice any drop in tranny fluid after the install, so I didn’t need to add any more fluid, but be sure to check the level if you’ve got the automatic transmission just in case.
The new radiator and thermostat definitely took care of my cooling problems. My rig runs at about 180* for the first 30-40 minutes of driving then warms to about 200-205*. It still hits 210-215* every now and then during traffic or cruising on the highway (pushing 33’s with stock gears and the AC on max probably works the engine a little hard), but for the 100+*F we’ve been having here in Texas, I figure it’s doing pretty good. If you’re considering a new radiator, I’d highly recommend the GDI 3-Core. I think you’d be hard-pressed to find a better radiator for a cheaper price.
For more information, contact:
Radiator.com
2990 Bay Vista Industrial Center
Benicia, CA 94510
1-888-723-4286
help@radiator.com
http://www.radiator.com/
2 Comments so far
I can’t get page two to print. Is there another article on replacing the radiator for my 1990 jeep 4.0
thanks
[…] […]