


 |
OYR Corner Guards and LEDs |
Now it’s time to setup the LED lights. If you splice the LEDs directly into the OEM harness, they’ll flash very fast when you turn on your blinkers or hazard lights. I think that on YJ’s you can fix this by replaced the regular flasher relay with a heavy duty unit, but on a TJ you either need to modify the flasher relay itself (the article on Rockcrawler.com goes over this) or do what we did and use an inline resistor. The resistor you’ll need is a 20W 8ohm resistor. You can pick them up at RadioShack for about $1.75 a piece (you’ll need one for each light).
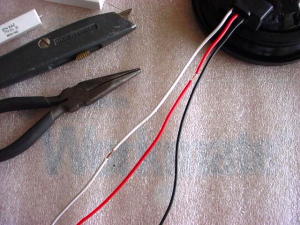 strip back the insulation from the power and ground wires |
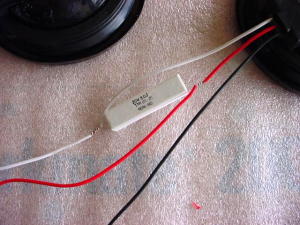 connect the resistor and solder the leads |
Carefully strip away about ¼” of the insulation from the red (power) and white (ground) wires on the LED pigtails as shown. Now connect the resistor into the pigtail where you stripped the insulation off. Solder the connections then seal them with some heat shrink wrap or silicon to prevent them from corroding.
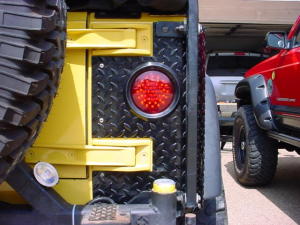
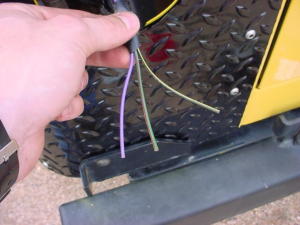 the tail light wiring harness… |
 ground the white pigtail wire to the body |
When you cut the stock tail lights off, leave enough of the harness on the body to attach the new LED pigtails to. The OEM harness has 3 wires – the black wire is negative, the wire with the reddish stripe is positive/power, and the purple wire is for the reverse lights.
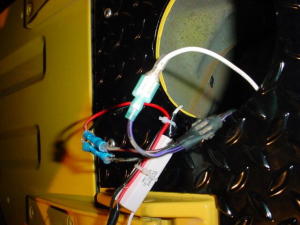
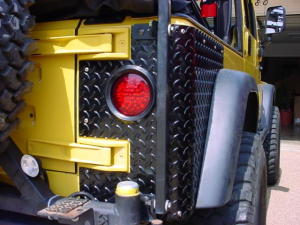
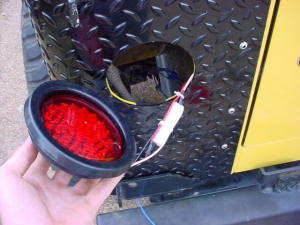 the pigtail ziptied together, the grommet goes in first though |
 yeah, that’s how it’s supposed to go in… |
As mentioned above, the white wire on the pigtail is the ground wire and will to be connected to the body somewhere. Easy enough, just put a ¼” ring terminal on the end and connect it to the back of one of the ¼” mounting bolts for the OYR panels. Then connect the red wire on the pigtail to the original red-stripped wire and the black wire to the original black wire. To mount the lights, simply push the grommet into place on the body then snap the light into the grommet.
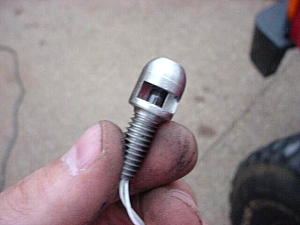 A Lite-N-Bolt |
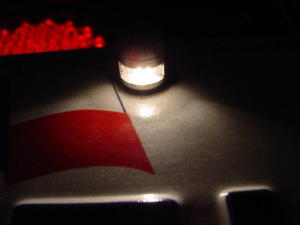 not a ton of light, but it works, and it’s legal, pretty slick too! |
The support bars for our Garvin rack have a license plate mount built-in, so we didn’t have to mess with drilling any holes for mounting the plate. The Lite-N-Boltz fit the original mounting holes perfectly and come with plastic nuts so you don’t over torque them and break the Lite-N-Bolt itself (the plastic nut will break before the bolt). Wire the Lite-N-Boltz together then ground one wire and connect the other wire to the positive tail light lead.
 Use the purple wire to power the reverse lights. |
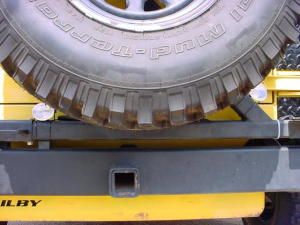 The new reverse lights secured in place. |
For the reverse lights you can simply spice into the purple wire on the passenger-side tail light harness. There’s only one power wire for the reverse lights going from the firewall to the back anyway, so running both new reverse lights off this wire is no problem. The lights are mounted to the tire carrier on either side of the tire (a 32″ BFG MT in this pic). Unfortunately our current 35’s block the lights, so we’re going to have to move them. We also rigged the lights up on a 2-way switch on the dash, so we can turn them on whenever we want (good for tailgaters), or just have them on come in reverse as normal. That’s all there is to it.
 The final product. |
 So who’s ready to wheel? |
| For more information, contact: | |
| JeepersAndCreepers San Francisco, California (415) 387-2323 http://www.jeepersandcreepers.com general@jeepersandcreepers.com |
PartsSystems 1011 N Vancouver Way Portland, OR 97217 1-888-283-2075 http://www.partssystems.com/ |
| Off Your Rocker PO Box 462 Half Moon Bay, CA 94019 (650) 726-3008 http://www.offyourrockers.com geepn@aol.com |
CBRack.com 023 Navidad Rd. Houston, TX 77083 (281) 530-4543 http://www.cbrack.com doug@cbrack.com |