 |
OffRoadOnly’s U-Turn Crossover Steering System |
Installation date: 11/06/2004
If the thought of shelling out about $650 for a bolt-on cross-over steering conversion for a D30 just totally turns you off, you should probably hit the BACK button right now and check out some other write-up. But, if a heavy-duty cross-over system for your D30 that requires no extra mods sounds like just what you’ve been looking for, read on my friend.
ORO’s instructions are great (some of the best I’ve ever seen), and include lots of reference photos. They even go over how to set the alignment after you finish with the install. The kit was originally designed to go with their AiRock TJ suspensions, but it works just as well on other late model Jeeps — one of the early installs I saw was actually on a YJ.
Anyway, I installed the kit in a saturday afternoon and so far I’m pretty happy with it. The install went smoothly, and it’s all pretty basic really – unbolt the stock stuff, bolt up the new stuff. There’s not even any drilling required. The bolts that go up through the knuckle arms use an aluminum crush sleeve to deal with the taper, and boy is it solid once you get it all torqued down.
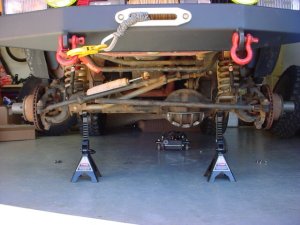
Technically you don’t have to pull off the wheels to do the install, depending on your rim backspacing and tires, but I decided it’d be a lot easier to do everything with the wheels off and the front on jackstands, and it would make for better photos too.
 |
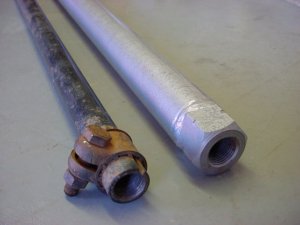 |
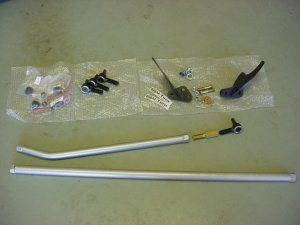
The draglink is 1.25″ diameter 4130 chromoly, the tierod is 1.375″ diameter 4130 chromoly, and both are heat-treated for brute strength. The kit also includes two bolt-on steering hubs (one for each knuckle), 4 Spicer TRE’s, jamnuts, a custom adjustment link for the draglink, a steering stabilizer mount, and all the necessary hardware.
 |
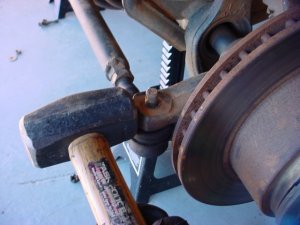 |
The installation starts of course, with the removal of the stock stuff. The first thing I’d do, to help with resetting the toe later on, is measure across the front of the disc brakes from side to side and write that number down. Next, pull all the cotter pins off the steering and remove all the castle nuts. You’ll probably need to use a “pickle fork” to pop all the TRE’s loose, but sometimes it’s also helpful to give the knuckles a whack on the front with a hammer. This helps loosen up the TRE’s.
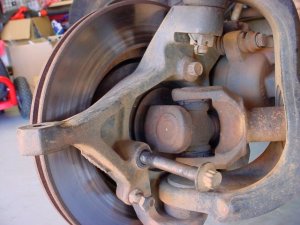 |
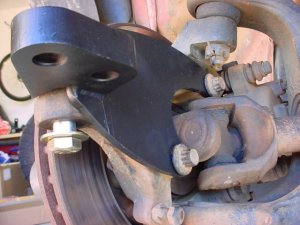 |
Next up you’ll need to pull out the front two hub bolts on the side of the knuckles. You’ll need a 12-point 13mm socket to do this. Put the new steering hubs on the knuckle (they’re left and right specific, the right side is the one with two holes) and put the hub bolts back in. Don’t torque the hub bolts down until you’ve torged down the new main bolt though. This bolt goes in from the bottom of the knuckle along with a washer and an aluminum crush sleeve as shown. When you torque down this bolt, hold the bolt head still and tighten the nut to keep the bolt and crush sleeve from spinning. Now do the same for the other knuckle.
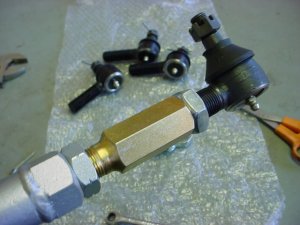 |
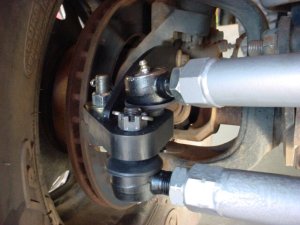 |
All that’s really left to do at this point is to assemble the draglink and tierod per the instructions and bolt them on. The tierod mounts under the new steering hubs and in the front hole on the passenger-side hub. The draglink mounts to the top of the steering hub in the hole behind the tierod. I’ve had folks ask about mounting the tierod on top of the steering hubs for more clearance, but there’s just not enough room to fit it and the draglink on the top.
If you’re doing the install on an XJ with 5″ or more of lift, set everything on the draglink about 1/4″ longer than what’s specified in the instructions, otherwise you’ll probably have to adjust out the adjustment link pretty far to get the steering wheel centered.
 |
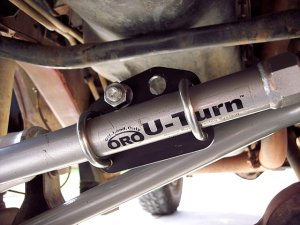 |
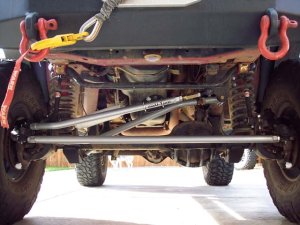
The steering stabilizer bracket mounts to the draglink with supplied stainless u-bolts. There are two holes in the bracket to account for different stabilizer mounting hardware and to give you a bit of flexibility in the final position of the stabilizer. The instructions I got with my kit (which was a very early production kit) stated that you needed to use a stabilizer with 8″ of travel, but I found that a regular OEM replacement stabilizer with 7″ of travel fits just fine. I actually prefer the lighter feel of the steering without a stabilizer, so I’ve since removed it, more on that later.
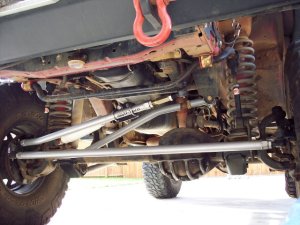
The new steering hubs raise the draglink about 3″, and the tierod about 1/2-3/4″. As you can see in the pics, the draglink is actually bent to clear the swaybar mount on the axle. At full left lock, the end of the draglink still gets pretty close to the bottom of my JKS disconnect, but it has never actually made contact (unlike the tierod TRE on my stock steering).
So far I’ve put a couple thousand miles on the kit, mostly highway driving, and even without a steering stabilizer it’s smooth and controlled. No signs of death wobble or vibrations or anything. And oddly enough, like someone else with the kit had reported on a forum, it seems more stable in crosswinds. It doesn’t feel like I’m getting blown all over the road (as much) anymore.
There is a hint of bumpsteer though. The kit was specifically designed for a TJ with a trackbar drop bracket (like what comes with RE’s long-arm kits) and the stock pitman arm, so any other configuration is likely to experience a little bit of bumpsteer due to the different angles on the draglink and trackbar. Since RE’s XJ trackbar bracket doesn’t lower the pivot any, I’m getting some minor bumpsteer effects. It’s not enough to me to even bother with though, and after a week of driving I didn’t even notice it anymore.
As I said above, so far I’m really happy with the kit. Steering angles are improved some, it gets rid of the inverted-Y geometry, and the steering feels more responsive and precise. The only real downsides I can think of is it’s not as easy to adjust the draglink as it is with the stock linkage (though it’s easier than any other aftermarket crossover kit), and I’ll probably have to disconnect one end of the tierod if I need to remove the trackbar’s axle bolt (since the tierod runs directly in front of the bolt), but that’s no big deal.
 |
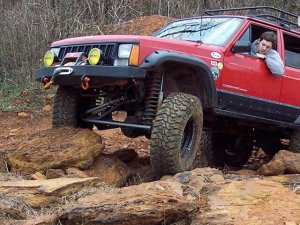 |
As of writing this article, I’ve tested the setup on two wheeling trips where it’s worked flawlessly. The draglink never flinched, and some scratches in the Rustoleum Hammerite paint job are all I managed to do to the tierod after smashing it into rocks (sometimes on purpose, sometimes not).
If you’re looking for a complete steering system for your Dana30 front end (the kit works with Rubicon Dana44 fronts too), I think you’ll be hard-pressed to find a better kit than OffRoadOnly’s U-Turn kit, especially when you consider that there’s no additional mods necessary to run the kit — no trackbar relocation, no swaybar mount relocation, just bolt it on and go Jeepin’!
For more pics from the install, check out my install photo album.
The ORO U-Turn kit is available through our own JeepinOutfitters.com.
For more information, contact:
OffRoadOnly
http://www.offroadonly.com/
info@offroadonly.com
651-644-2323


