Jeepin.com Forums  

Go Back   Jeepin.com Forums > Tech > Jeep Talk
Register FAQ Community Calendar Today's Posts Search

Reply
 
Thread Tools Display Modes
Old 11-04-2017, 02:23 PM   #1
Sir Sam
Working Mother
 
Join Date: Mar 2004
Posts: 19,918
Send a message via AIM to Sir Sam
Default Project CRD MJ:

Reposting for posterity:


Alrighty, as some of you may or may not know a year ago I finally won the bid on a wrecked CRD. Since 2005 I had been bidding on wrecked CRDs and had been constantly outbid even on low prices(like loosing a bid at $2600). Well I was ecstatic that I finally won the bid, the only downside is that the Jeep was for my father not me. We proceeded to fix the vehicle and drive it out to california for him, he has been driving it ever since and has run up over 30k miles in only a year, the little oiler makes a great vehicle for him. Its repair can be seen here:
http://www.colorado4wheel.com/images...rtyrepair.html

Well a little while back now at the beginning of april, and uncannily enough exactly one year after purchaing my fathers Jeep, on my 22nd birthday I purchased an engine that I had found on craigslist. The engine was setup to mate to the NV3550. A plan was formulated and I started looking for an MJ.


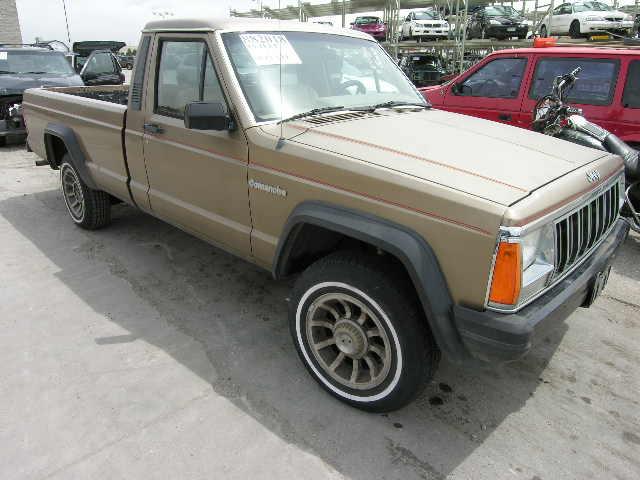
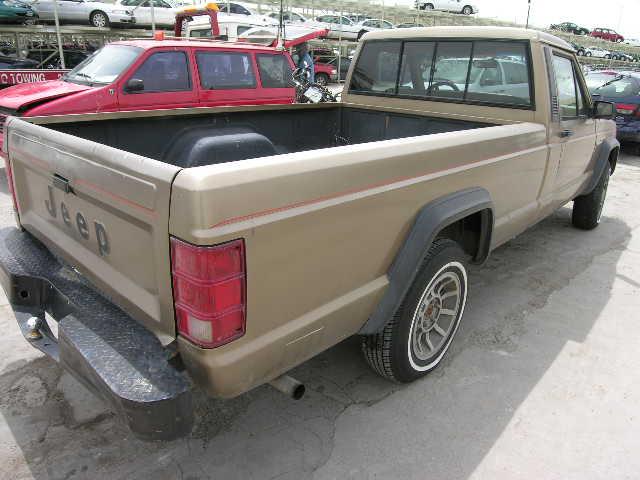
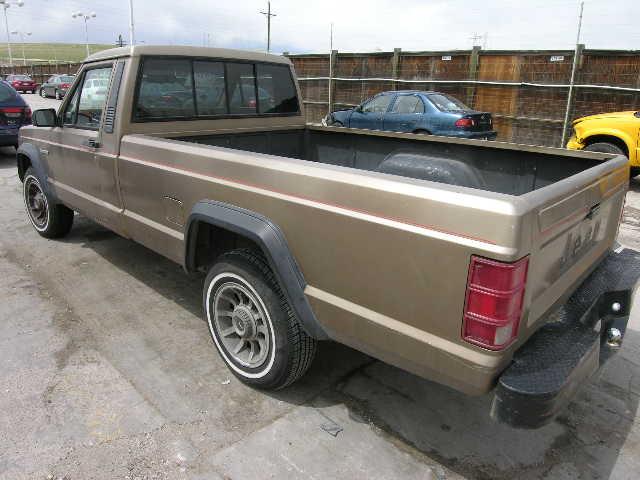
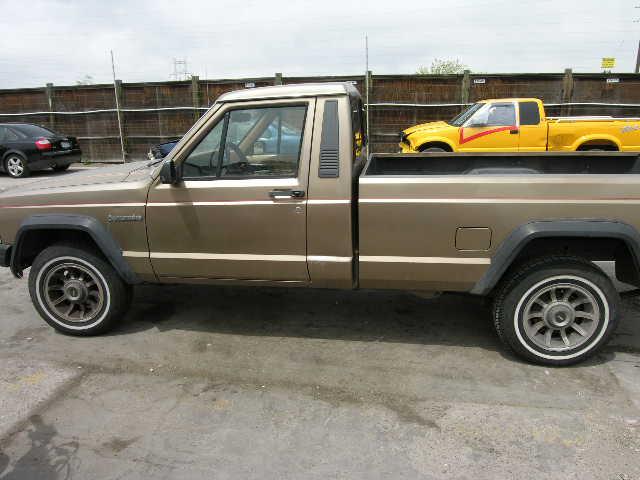
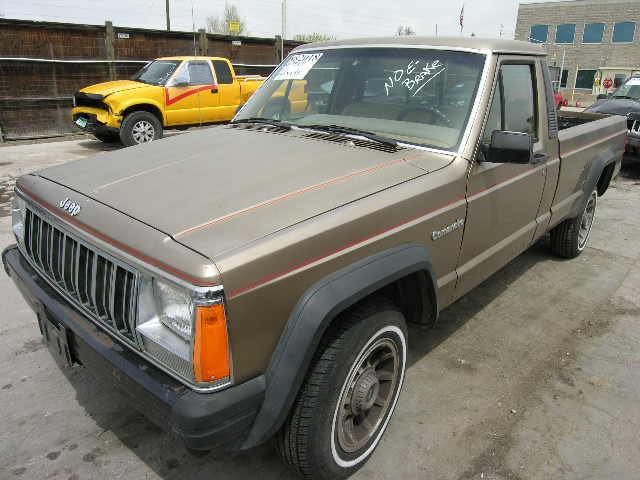
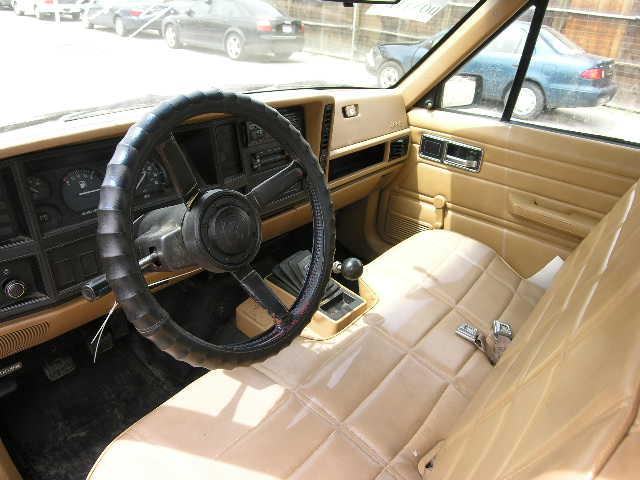
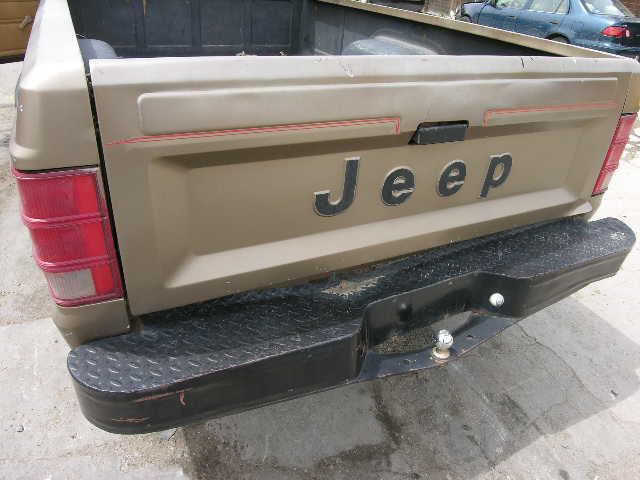
Now I had been stalking a MJ at my local insurance auction for a few weeks, well everything worked out just right and today I won the bid on it for $850:
http://www.klode.com/Kws/Napplicatio...018&Exit=Close
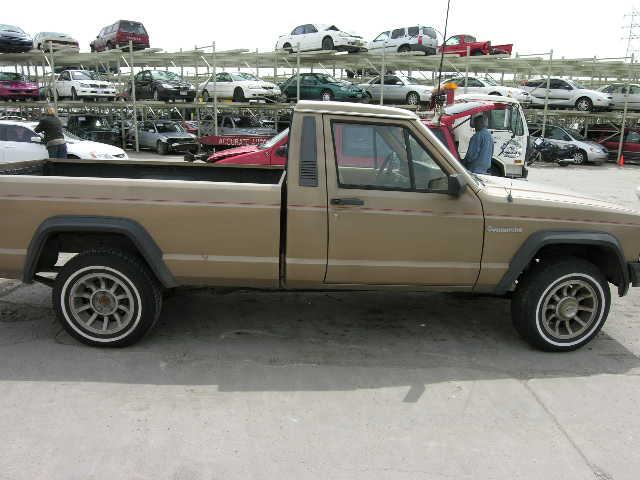


So the project should begin in earnest soon. The CRD engine, with a NV3550 and NP242 will be dropped in. A 4WD front end will be installed, and Dana 44 in the rear. I have the interior/dash out of a 01XJ that will be installed. 97+ doors will be put on as well.(some of these parts to either be sourced cheap from the junkyard, or a parts TJ or XJ).

The Chinese Jeep 2500 front ends parts will be installed, and the whole vehicle will be repainted PR4 - Flame Red. Later 16" FreedomXJ/5.9ZJ wheels will be installed and a shell for camping put on the back.

Jeep 2500 front end:
http://www.colorado4wheel.com/content/Jeep2500.html


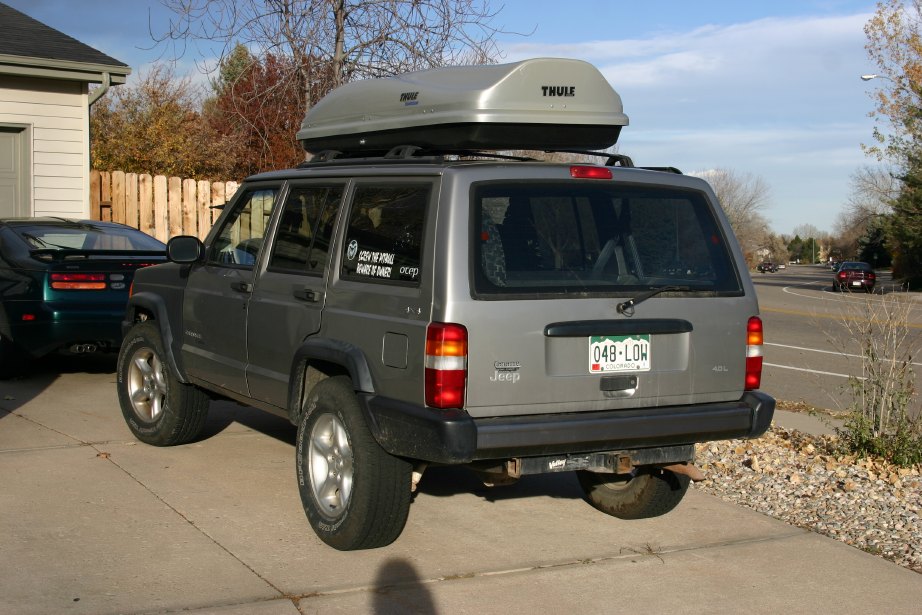
The tail lights will be the overseas 97+ XJ tailights as seen here(as well as the 16" freedom wheels seen here):
Sir Sam is offline   Reply With Quote
Old 11-04-2017, 02:24 PM   #2
Sir Sam
Working Mother
 
Join Date: Mar 2004
Posts: 19,918
Send a message via AIM to Sir Sam
Default

Quote:
Originally Posted by Sir Sam
This information is just for reference right now:

Since the XJ uses the older CCD bus and my engine/bosch ECU uses the new PCI bus this means that I will not be able to use the XJ 97-01 gauge cluster. All the important information(engine speed, vehicle speed, water temp, oil pressure etc) is carried on the CCD or PCI.

Basically, if you try to use the XJ cluster nothing will work except the basic things like turn signal indicators.

So to that end a very nice solution presents itself. The TJ gauge cluster is the same basic size and shape as the XJ cluster, but the newer TJ clusters use the PCI bus.

To that end a TJ gauge cluster will replace the XJ gauge cluster in my dash, it will require some basic wiring work, if possible I will de pin the XJ connectors and insert the pins where needed into the TJ cluster. This is the best solution because it keeps the stock wiring intact with fewer splices and therefor fewer places for a future failure to occur.

Anyways, here is what will need to be connected for that to work:
archival post quoted.
Sir Sam is offline   Reply With Quote
Old 11-04-2017, 02:25 PM   #3
Sir Sam
Working Mother
 
Join Date: Mar 2004
Posts: 19,918
Send a message via AIM to Sir Sam
Default

Quote:
Originally Posted by Sir Sam
More reference information:

Quote:
Originally Posted by Root Moose
For the interior are you planning to make the air bags functional or gut them and use them to make the interior look complete?

I don't see why the entire SRS harness couldn't be transferred over to an older XJ... it's not like anything structural changed. the sensor locations and such should still be valid unless there is some kind of a ECU tie in with the air bag ECU.
Quote:
Originally Posted by jtdesigns

Most airbag systems I've ran into have there own computer with them, most of the time you have to swap the srs unit with the bags. I know airbags also require a speed input too, so you'd have to get the wheel speed sensors too, or the vehicle speed sensor.. I dont know which one jeeps use.

The XJ ACM(Airbag Control Module) is a self contained unit that sits under the center console, there are no crash zone sensors as many other airbag systems have, merely the accelerometer/safing sensor located in the module.

There is not a direct connection between the ACM and the vehicle speed sensor, The XJ ACM does use the CCD bus connect, though the wiring diagrams seem to indicate that it connects to the gauge cluster(presumably for the airbag light) and the data link connector(for diagnostic).

Regardless I still have some concern that the ACM will need the vehicle speed information available on the CCD bus. This is a problem because the KJ CRD ECU uses the newer PCI bus.

If the vehicle speed information is needed for the ACM to operate properly then I will use a XJ CCD PCM(basically a 97-01 XJ PCM) connect the 5V supply, ground, and speed sensor signal back to the XJ PCM where needed, and connect the PCM to switched power as needed. This will then take the speed signal coming from the speedo pickup and broadcast it via the CCD bus. Since the vehicle is getting rewired with the PCI bus for all critical functions the CCD will be a secondary bus system that only contains information for the ACM.

So by doing it this way I can ensure that the airbag systems will still remain functional.

archival post quoted.
Sir Sam is offline   Reply With Quote
Old 11-04-2017, 02:25 PM   #4
Sir Sam
Working Mother
 
Join Date: Mar 2004
Posts: 19,918
Send a message via AIM to Sir Sam
Default

Quote:
Originally Posted by Sir Sam
Quote:
Originally Posted by phillyzj
how did you get all the electronics that you needed?
My engine was a complete engine, with clutch flywheel wiring harness etc.

The only thing that prevents the engine from running right now are the ECU and APPS.

I have sourced an ECU and a guy in the UK is holding it for me while we find me an APPS unfortunatly for me the KJ I got my ECU out of had the APPS stolen.

At worst case scenario I have to spend 100 pounds for a new APPS in the UK.

Quote:
Originally Posted by Timmay
That's not bad at all. Hell, I spent that on my 3550. I might need you to help me find one.


Colin, you can make your own APPS for about $40. I'm thinking about doing it on the cummins because the stock one blows.
Or just grab an APPS from any number of drive by wire cars, heck toyotas and Jeeps share the same APPS unit now.


So the last bit of engine management stuff I need is an APPS. There is a diesel XJ that I could get the APPS out of, as you can see in the wiring diagram below they only differ by a single pin(which could be moved), the real concern is if the APPS returns the same voltage between the two.
(an Accelerator Pedal Postion Sensor is basically just a big POT=Potentiometer)

Now I could use a 05+ CRD POT, which indecently is shared by newer toyotas, but it would take a good deal more work to ensure I got the right voltage out of the pot.

So for reference:


So even if the XJ APPS does not return the same voltage a variable resistor connected inline could allow me to play around with it so that I got my throttle input right.

Archival post quoted.
Sir Sam is offline   Reply With Quote
Old 11-04-2017, 02:26 PM   #5
Sir Sam
Working Mother
 
Join Date: Mar 2004
Posts: 19,918
Send a message via AIM to Sir Sam
Default

Archival post quoted:

Quote:
Originally Posted by Sir Sam
Well the tow truck arrived today with the MJ, battery was dead so I had to push it up into the driveway.

Put the battery charger on it and after a few hours it cranked enough for it to catch and startup.

Had the battery charger on all day untill about 6:30, took the charger off, started it once, then shut it off. An hour later I came back and it turned over once or twice and then just clicked.

Ran down to sams club and got a new battery, dropped it in and it fired right up. Moved it back and forth a little bit before backing it out of the driveway and going for a quick spin in my culdesac. Drives just fine, brakes feel a little soft.

Oil on the dipstick looks about 2 quarts overfilled(way overfilled), right now after it runs for a little bit oil just spits out from around the valve cover. I will drain some oil, degrease engine, and then take a look at things.

I saw no evidence of coolant leak when I drove it. Who knows.


Oh ya, and the parking brake doesn't work. Also, it was a trip not to find it next to the center console, I wasn't expecting that.
Sir Sam is offline   Reply With Quote
Old 11-04-2017, 02:27 PM   #6
Sir Sam
Working Mother
 
Join Date: Mar 2004
Posts: 19,918
Send a message via AIM to Sir Sam
Default

Archival post quoted:
Quote:
Originally Posted by Sir Sam
Getting closer, got some misc connectors and crap I need to tie the CRD harness into the XJ dash harness, though they are slightly different so I will need to trim the plugs to fit. (they have an indexing tab so you can't install the wrong plug in the wrong place, great when you have 3 similar plugs together, not great when you can only find the one plug) I might check and see if I can get some repair connectors from Jeep that will give me the correct plug so I dont have to trim some off the plugs I have now.

Sir Sam is offline   Reply With Quote
Old 11-04-2017, 02:28 PM   #7
Sir Sam
Working Mother
 
Join Date: Mar 2004
Posts: 19,918
Send a message via AIM to Sir Sam
Default

Archival post quoted:

Quote:
Originally Posted by Sir Sam
Some more parts arrived:
Hehehe......return home from my early class, looky whats here at the door:

Now lets get her inside and open her up!


Ohhhhh purdy:


As you can see its just a normal H3 bulb. I'm thinking H4 Xenons for the headlights, and H3 Xenons for the low beams........hehehehe
Sir Sam is offline   Reply With Quote
Old 11-04-2017, 02:28 PM   #8
Sir Sam
Working Mother
 
Join Date: Mar 2004
Posts: 19,918
Send a message via AIM to Sir Sam
Default

Archival post quoted:

Quote:
Originally Posted by Sir Sam
I decided they would look better out in the sun, so I went and took some more pics. Turns out they are way cooler looking out there:


Sir Sam is offline   Reply With Quote
Old 11-04-2017, 02:29 PM   #9
Sir Sam
Working Mother
 
Join Date: Mar 2004
Posts: 19,918
Send a message via AIM to Sir Sam
Default

Archival post qouted:

Quote:
Originally Posted by Sir Sam
Snapped some pics under the MJ today:

Ew, 2wd, gross!


Some light surface rust on stuff, but nothing structural or cancerous. Might try to get it sand blasted instead of wire-brush-drilled.


The one part of the body where I will need to do bodywork:


Testing out the 2500 flares, they basically take up the same amount of fender space that the 97+ flares do, but have a somewhat different "squared off" shape to them.


We will not be able to use the 97+ flare tie downs without modification:
Sir Sam is offline   Reply With Quote
Old 11-04-2017, 02:29 PM   #10
Sir Sam
Working Mother
 
Join Date: Mar 2004
Posts: 19,918
Send a message via AIM to Sir Sam
Default

old post quoted:

Quote:
Originally Posted by Sir Sam
Bought this NV3550 for my MJ today for $550:


As you can see the bellhousing is broken so I got him down by $50, its the wrong bellhousing for me anyways, pictured next to it is the correct bellhousing for the CRD engine.
Sir Sam is offline   Reply With Quote
Old 11-04-2017, 02:30 PM   #11
Sir Sam
Working Mother
 
Join Date: Mar 2004
Posts: 19,918
Send a message via AIM to Sir Sam
Default

old post quoted:

Quote:
Originally Posted by Sir Sam
MJ gets some new shoes:


Got em for $300 locally, wheels are just about perfect, nar a scratch on them....for now.


Got the master/slave combo out of a 96 today, gonna go back on sunday and grab a NP242.

Here you can see the difference between the 4Liter bellhousing and the CRD bellhousing:


Got the master/slave, plus a bunch of other junk for $26.
Sir Sam is offline   Reply With Quote
Old 11-04-2017, 02:30 PM   #12
Sir Sam
Working Mother
 
Join Date: Mar 2004
Posts: 19,918
Send a message via AIM to Sir Sam
Default

old post quoted:

Quote:
Originally Posted by Sir Sam
Got in my indicator lights, APPS, and ECU.

I only need a new injector top and some diesel before I can start this sucker up!


Sir Sam is offline   Reply With Quote
Old 11-04-2017, 02:31 PM   #13
Sir Sam
Working Mother
 
Join Date: Mar 2004
Posts: 19,918
Send a message via AIM to Sir Sam
Default

old post quoted:

Quote:
Originally Posted by Sir Sam
Quote:
Originally Posted by MiguelXJ View Post
Damn you work fast...

Good luck on the project! looks promising!
Not quick enough.

Got me a transfer case out of a 98 today, paid $100 also got the wheel skid plate, and power seat pedistal for a grand total of $130. Not too shabby, I should told him it was out of a 94 and then it would have been $75.

Lotsa junk in my garage:


All bolted together:


Slave mocked up:


A limited lace wheel and transfer skid:
Sir Sam is offline   Reply With Quote
Old 11-04-2017, 02:32 PM   #14
Sir Sam
Working Mother
 
Join Date: Mar 2004
Posts: 19,918
Send a message via AIM to Sir Sam
Default

old post quoted:

Quote:
Originally Posted by Sir Sam
Ok so these are the engine mounts for a diesel XJ,

then here you can see that while the mounts are similar in design, they do not bolt in the same place, rather they set slighter further back in the engine bay, and utilize some different bolts.


Now from what I can see in the pictures of those mounts and from looking at my engine it looks like these mounts might share the engine side bolt pattern, if this is the case then I might be able to get real lucky and just have the motor boltin to the engine bay, boltup to the factory tranny support, and not have to build either of those.

If I am not so lucky(which history would seem to indicate that I am not), then I will not be able to use the engine side bracket, in which case using the XJ diesel motor mounts will probably still be better, they set further back and are almost necessary. It appears that trying to use the gasser XJ mounts will actually interfere with things like the AC compressor, Injection Pump, and Power steering. So right now the plan is to use diesel XJ mounts, and probably have to build my own engine side brackets.

Now something else has come up, if my ECU came from a vehicle with a SKIM(sentry key immobilizer module) then I will either need to get the calibration reset from my ECU, or get a SKIM and transponder key and have both the SKIM and the ECU reprogrammed via the DRBIII to match.
Sir Sam is offline   Reply With Quote
Old 11-04-2017, 02:33 PM   #15
Sir Sam
Working Mother
 
Join Date: Mar 2004
Posts: 19,918
Send a message via AIM to Sir Sam
Default

old post quoted:
Quote:
Originally Posted by Sir Sam
Ok, did a little bit of teardown and started looking at what it would take to get this 2500 header panel to fit.


So as you can see the 2500 header fits back in a little bit:

I measure 3.25" deep:

And I measure 3.25" back from the leading edge of the hood. So basically the header is supposed to sit back flush against the front face of the "headlight bucket" so it looks like I will be trimming off that whole side piece where the fender bracket ties the fender to the "headlight bucket" with the ~.25" gap between the header panel and the hood I think that will be just about right.

And semi naked:
Sir Sam is offline   Reply With Quote
Old 11-04-2017, 02:34 PM   #16
Sir Sam
Working Mother
 
Join Date: Mar 2004
Posts: 19,918
Send a message via AIM to Sir Sam
Default

Old post quoted:

Quote:
Originally Posted by Sir Sam
Started pulling the interior panels out of the MJ, ripped out the carpet tonight, more rust than I was expecting given the outside condition of the vehicle, guess it was that wet carpet syndrome that got to it.

Lucky none of it is through the body, and none of it is even soft, went around and tapped on all the rusty spots with welding hammer, all if it is good and solid, and basically appears just to be a heavily pitted surface rust.

So right now the plan is to wire brush everything with rust on it, then get some POR15 and coat everything well(after I make modifications to the floor for the newer seats to bolt in), then the POR15 will get covered with the sound deadening material.

Anyone have anything else to consider for rust abatement?


Here you can see a VERY quick pass(not even 30 secs worth) of wire brush, compared to what it looked like before. I think the wire brush will work well on the surfaces I can get to, its the seam where I cannot get between, or the channel that I cannot get between, that worries me.

Of course, if this is as bad as it is after 22 years, another 22 years of equally bad rust wouldn't be the end of the world. Who knows, I somehow doubt I will still own the Jeep in 22 years(maybe, thats a long ways off)


I also found a muzzle brake under the carpet, LOL
Sir Sam is offline   Reply With Quote
Old 11-04-2017, 02:34 PM   #17
Sir Sam
Working Mother
 
Join Date: Mar 2004
Posts: 19,918
Send a message via AIM to Sir Sam
Default

Old post quoted:

Quote:
Originally Posted by Sir Sam
Hehehe, check out what I'm going to pickup:


I will use one switch for the heated mirrors, one for my foglights, probably leaving 2 extra light switches for accessory lighting. If my diesel ECU has a high idle option I may choose to enable that and get the stock high idle switch.
Sir Sam is offline   Reply With Quote
Old 11-04-2017, 02:35 PM   #18
Sir Sam
Working Mother
 
Join Date: Mar 2004
Posts: 19,918
Send a message via AIM to Sir Sam
Default

old post quoted:

Quote:
Originally Posted by Sir Sam
Well I had been wondering about what to do for a radiator, and the 4cyl 2.5 radiator seems like it was perfect match....unfortunatly no one seems to make a good replacement radiator for it, only single core, plastic aluminum setups. There are some all aluminum radiators on ebay, but they are single core.

Well this was all moot, I was just going to wait untill I came to that bridge to burn it. The thinking was that I would wait untill I knew for certain what I needed to use for a radiator to order one....I have a good 2 core OEM radiator here from a 2001 6 cyl, that I could use, and I have the crappy old radiator from my MJ I could use for mockup. The problem was, the more I looked at it and the more I measured the more certain I became that I would need to use it. Which left me with the problem that if I did need to use it, there would not be a good replacement option.

Now anyone can spend the time to custom mount a custom radiator, or an off the shelf radiator for something like a YJ/TJ, but since I am faced with enough fabrication already here I am hoping for something that will bolt in.

Now that being said I came across something at the junkyard that is either a windfall, or a white elephant, here we have a nearly new, single core(but thicker than a double core) OEM style radiator, $50 is a little pricey in my mind, but if it works out will be a good solution. If it doesn't well crap, I just wasted $50.


Got the windshield removed and safely stored in the basement:


Got some tie downs off of a ford exploder sport track(and a 8.8 with 4.10s and LSD- all ready sold :rock on: )


And of course further probing reveals more rust, what ticked me off about this bit was all the rust was below the seam sealer........ya, the metal rusted out below the seam sealer......grrr, oh well, I got a junk hood that I will raid for patch metal. Fun part is going to be welded in the patch panel with an Arc welder......I got some 1/32" sticks that seem to work OK on sheet metal.


I need to spend a hour or so cleaning up before I move on with work, garage is cluttered with a bunch of parts strewn around.


I got these dollys at harbor freight, they actually work really well for rolling the Jeep back and forth in the garage, I would highly recommend them to anyone who thinks they might be useful.
Sir Sam is offline   Reply With Quote
Old 11-04-2017, 02:36 PM   #19
Sir Sam
Working Mother
 
Join Date: Mar 2004
Posts: 19,918
Send a message via AIM to Sir Sam
Default

old post quoted:

Quote:
Originally Posted by Sir Sam
Got the engine out today, pulled the engine and trans together, and of course, what do I realize as soon as I start pulling the engine......i forgot to drain the tranny, ya, it dumped all its gear oil all over my garage floor.

I swear, thats like the 4th time I have forgotten that. Dammit Dammit Dammit.

so I rolled it outside(easy to push with no engine trans, interior, etc etc) and washed out the garage and also scrubbed down the engine bay. Got it pretty clean, normally I wouldn't bother but it needs to be throughly degreased before I can shoot paint.

Still need to do some other cleanup and tear down before I can shoot paint, though I will probably wait to shoot the engine bay untill later, going to try and get most stuff mocked up, then ripped back out for paint.

this weeks major goal is the get the drivetrain in place so I can move on to mocking up the interior, front end body parts, AC, intercooler, etc.


Sir Sam is offline   Reply With Quote
Old 11-04-2017, 02:36 PM   #20
Sir Sam
Working Mother
 
Join Date: Mar 2004
Posts: 19,918
Send a message via AIM to Sir Sam
Default

old post quoted:

Quote:
Originally Posted by Sir Sam
Lots of extra metal on the fender that needs to be removed:

Here you can see the parts of the headlight support that need to be trimmed:


This will be my drivers side engine mount, its a engine mount for something, I just grabbed it off the shelf at autozone because it looked close, it has the right height to clear the articulation of the upper control arm. I just wish it was heavier duty looking.

This is going to be the passenger side engine mount, its very similar in design to the OEM KJ mounts, but it only about 3" tall, the passenger side engine bracket sits up much taller than the drivers side, so I have to use the shorter one on the drivers side.


This is the Oil filter location, when I got the engine it came with a cartridge style oil filter that stuck way out, it just wasn't going to clear the frame rail, I was worried I wouldn't be able to fit anything and would need to get an oil filter relocation kit. So today at autozone I brought my parts down and started looking at oil filters, of course the larger fram PH8A and the sotck PH16 work, but both are too large, I started grabbing some off the shelf and it looks like the one I picked works perfect, as it turns out it looks like its for the 4cyl XJ/TJs........lucky for me I will actually be able to get this oil filter on and off when the engine installed:


Sir Sam is offline   Reply With Quote
Reply


Posting Rules
You may not post new threads
You may not post replies
You may not post attachments
You may not edit your posts

BB code is On
Smilies are On
[IMG] code is On
HTML code is Off

Forum Jump


All times are GMT -5. The time now is 05:12 PM.


Powered by vBulletin® Version 3.8.11
Copyright ©2000 - 2024, vBulletin Solutions Inc.