 |
AEM BruteForce TJ Intake System |
Since 1987 AEM (Advanced Engine Management) has been building performance products for cars, and has already made a big name for themselves in the import tuner market. They’ve now turned their sights on the currently hot truck and SUV aftermarket with their line of Brute Force performance intake systems. When AEM first approached us about an intake kit for our TJ I was honestly a bit hesitant. Not because I’d heard anything negative about AEM’s products (which I hadn’t), but because I’d already tried cone-conversion intake kits on our XJ from two different companies and hadn’t really seen any real gains from either of them. In fact, I’d since gone back to the stock airbox and a washable drop-in filter for reusability.
Always interested in trying out new products, I did some research on AEM and it looked like they really did their homework when it came to developing intake kit. This isn’t just some cheap tube with a cone filter stuck on the end, it’s a complete intake system specifically tuned for each application. The intake tube itself is mandrel-bent 6061 aluminum with TIG-welded fittings and brackets, and the filter features 4 layers of cotton gauze and is actually manufactured in-house by AEM. The TJ intake kits also include a 1″ throttle body spacer (which just happened to match the bore of our Jeepers&Creepers bored-out throttle body, bonus!).
One thing that kind of concerned me about the kit was the fact that intake tube was made of metal, which meant it would probably get pretty hot running over the top of the engine (the tube on the TurboCity kit I’d first run on my XJ would get so hot after a few hours of driving that it would literally burn your hand). AEM actually addresses that very issue in an article on their website, and their intake tube sits probably 2″ higher than the stock plastic tube and has a special heat-reflective powdercoating on it. That pretty much got rid of my concerns about the heat-issue, so all that was left was to get the kit and install it!
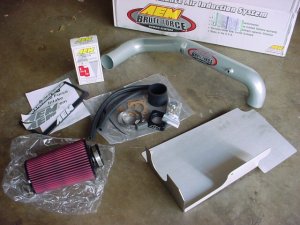 the complete kit, you even get cleaning kit for the filter!. |
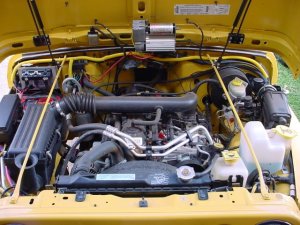 the stock intake setup, notice the QuickAir2 mounted to the hood… |
AEM’s Brute Force intake system isn’t cheap, it retails for about $320, but as I mentioned above it includes a throttle body spacer, as well as a stainless steel heat/splash guard and a cleaning kit so you’re actually getting a pretty fair amount for your money. And of course you get the obligatory stickers and even a license plate frame.
The install is relatively easy and only requires a few hand tools, and it should only take about 30 minutes or so to do. The first thing of course is to remove the factory intake tube and airbox.
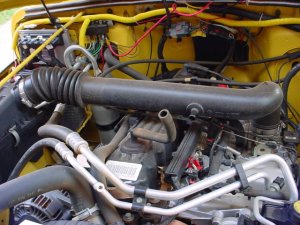 no more airbox… |
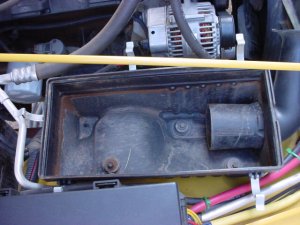 unbolt the throttle body |
The factory intake tube is clamped to the throttle body and airbox with regular hose clamps. Loosen these with a screw driver, unhook the breather tube and remove it, and the intake tube should pull right off. Next, pop open the stock airbox, pull out the old air filter, remove the 3 bolts that hold it to the fender, and pull it out as well.
 |
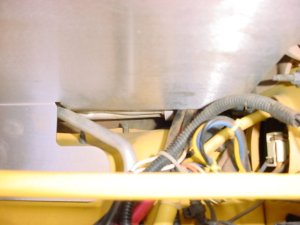 |
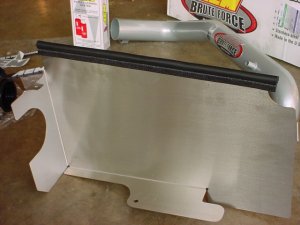
The heat/splash shield is next. Start out by attaching the supplied weather stripping, then test fit it to check for any clearance issues. I say this because we ran into some clearance problems between the heat shield and an AC hardline as well as the power cables for our winch.
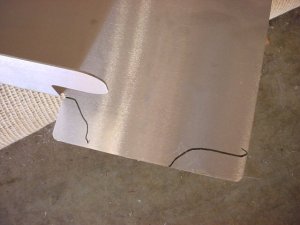 where to cut… |
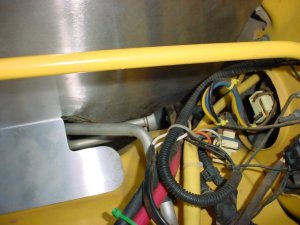 much better fit now. |
The clearance issues with the heat shield were really the only problems we ran into during the install. With the heat shield held in place, I marked what needed to be cut off and broke out my trusty Craftsman sabersaw. The stainless steel proved to be some pretty tough stuff though, and I wore out two saw blades cutting out the notches. Once the shield was trimmed up I was able to fit it all the way into place and bolt it down. It uses one of the OEM holes for the airbox mounts on the fender, as well as one of the radiator bolts on the grill. There’s also a special ziptie that connects the back of the heat shield to the grill support brace.
 |
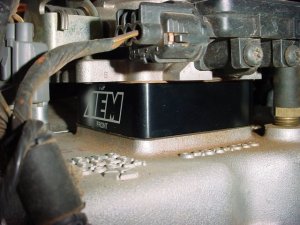 |
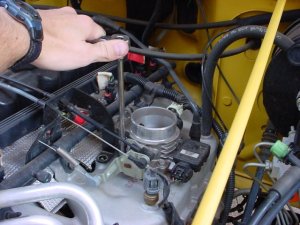
To install the throttle body spacer, you remove the four 13-mm bolts that hold the throttle body to the intake manifold, along with the three 13mm bolts that hold down the throttle cable bracket. With a supplied gasket on either side of the spacer, slip it under the throttle body and bolt it down using the four new longer bolts that come in the kit. Be careful not to over-tighten these bolts. 1″ spacers are also provided to go under the throttle cable bracket to keep everything lined up correctly. Just stick these under the bracket and bolt it back down as well with the new bolts from AEM.
As I mentioned near the start of this article, the AEM “Power Spacer” already had the right bore to match our Jeepers&Creepers 60mm bored-out throttle body, so that was nice. If you’re running a 62mm bored-out throttle body, you’ll probably need to have the AEM spacer bored to match though.
 |
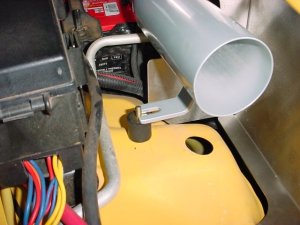 |
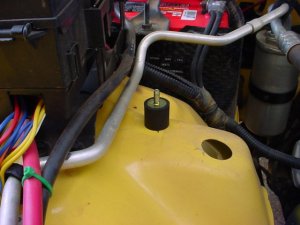
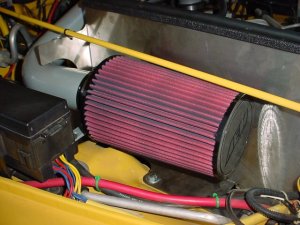
Now it’s time to mount the new AEM intake tube. The tube uses a rubber fitting and hose clamps to connect to the throttle body, and a special rubber stud-mount to bolt to the fender where the old air box was. The stud-mount uses one of the factory mounting holes, so no drilling is involved. Once the stud was in place and we fitted the new intake tube, we discovered that the mounting tab on the tube almost didn’t reach the stud. It was about a 1/2″ shorter than it needed to be, but it was just long enough so that once the top washer and nut were tightened down on the stud it still held pretty well (or well enough anyway).
 |
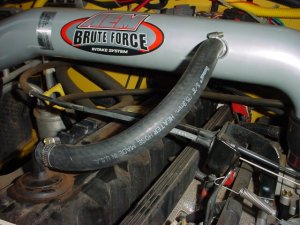 |
Now clamp the filter on the end of the tube and connect the new breather hose with hose clamps (all of which come in the kit). That’s it, you’re all done.
 |
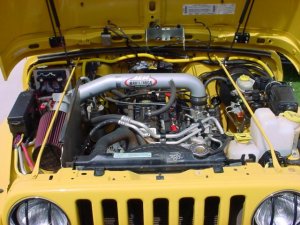 |
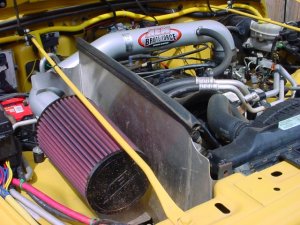
Those of you with keen eyes will notice that in the second photo at the top of this page there’s a QuickAir2 compressor mounted to the underside of the hood, and in the last photo above it’s gone except for the mounting bracket. This is because the taller AEM intake tube interfered with the QA2 when I tried to shut the hood. We’ve started carrying our PowerTank CO2 system in the TJ on trips now, so the electric compressor didn’t get much use anymore, and in reality it wasn’t a very handy spot to have it mounted anyway, so out it came. I’ll probably remount it to the tray under the brake booster one of these days.
So now you’re probably wondering… does it really work? AEM’s website has some dyno charts comparing before and after horsepower and torque, using a 2001 4.0L TJ as the test subject. According to those charts, the Brute Force intake system boasts a maximum gain of just over 13hp and 15ft-lbs of torque on the TJ. These maximum gains are seen pretty high, no, very high, in the rpm band though. The max HP gain came in at a whopping 5,000rpm, and the max torque gain was at 4,500 rpm. In normal driving though, when your engine’s going to be seeing rpms between 2,000 and 3,000, you can expect about and extra 5hp and 10ft-lbs of torque according to AEM’s dyno charts. We didn’t have a dyno available to see if AEM’s numbers were accurate, but from the seat-of-the-pants-feel, I’d say about 5hp and 10ft-lbs is about right. It’s not a major gain, but enough that you feel a little bit better throttle response and a little bit more oomph on the road.
We’ve never tried to keep track of the gas mileage we’re getting out of the TJ, so I can’t say if the intake system made any change there. I don’t remember seeing anywhere on AEM’s website where they claimed to increase gas mileage, so I wouldn’t expect for it to make any noticeable change there one way or the other.
And of course it’s got that classic high-flow intake “whoooooosh” sound to it, but it doesn’t have the high-pitched whistle that plagued the intake kits on our XJ, which is definitely a good thing.
For more information, contact:
Advanced Engine Management, Inc.
2205 126th Street, Unit A
Hawthorne Ca. 90250
Phone: (310) 484-2322
Fax: (310) 484-0152


