 |
The Drill Doctor DD750 |
The first time I saw a Drill Doctor was when I was walking through the Tool World section of Lowes. They had set up a display of the little turquoise units, and I remember wondering why it never occurred to me before that you could sharpen drill bits. You can sharpen most other kinds of metal blades, so why not drill bits too? Most of my “good” bits are Black&Decker “BulletTip” bits (same thing as the Dewalt PilotTips) which the DrillDoctor can’t sharpen, but over the years I’d also collected a fair number of regular bits for various projects on the Jeeps. After years of abuse, I mean use, drilling holes through bumpers, frame rails, skid plates, and all sorts of metal brackets, most of my bits were getting dull and some were even chipped. “One of those DrillDoctors could sure come in handy,” I remember thinking to myself.
A couple of weeks later my friend Mike over at Rockcrawler.com put up a review of the DrillDoctor 750 model, which is the top of the line DrillDoctor. Great timing! After reading through the review there (and using my drill bits some more) I was really interested in getting a DrillDoctor for myself, so I sent Mike an email to talk to him more about his. He put me in touch with some of the guys at DrillDoctor, and I talked to them about what all I needed. Seeing that I had a number of drill bits 1/2″ or bigger and some were 118* and some were 135*, that narrowed my choices down to the DD500 and the DD750. Since I was definitely going to be sharpening bits larger than 1/2″ right from the start, I went ahead and opted for the DD750 which comes with the chuck for larger bits (the DD500 can sharpen larger bits, but doesn’t come standard with the larger chuck). All DrillDoctor models can sharpen bits from 3/32″ to 1/2″, and the DD400, DD500, and DD750 can sharpen bits ranging from 1/2″ to 3/4″ with the larger chuck.
“Pro” kits of the DD400, DD500, and DD750 are also available which include a heavy-duty plastic storage case. Check out DrillDoctor’s comparison chart to see what models are available and what features each model has.
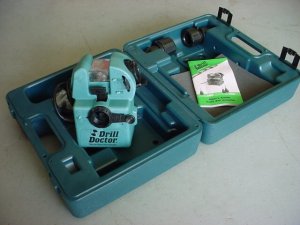 the DrillDoctor DD750 Pro Kit, minus the video… |
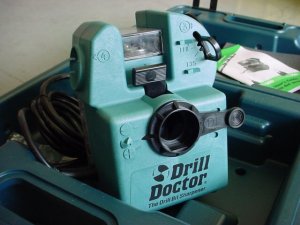 |
Using the DrillDoctor really isn’t that hard, but you do kind of have to get the hang of it to get good results each time. The instruction booklet is great, and they even include an instructional video with every model. Now that’s cool. Unfortunately we no longer own a working VCR (between Directv, Tivo, and our DVD player our whole entertainment system is digital now), so I was out of luck there (our VCR actually was “working” when I got the DrillDoctor, but it ate the instructional video, along with our copy of Christmas Vacation AND the head-cleaning tape we bought for it…).
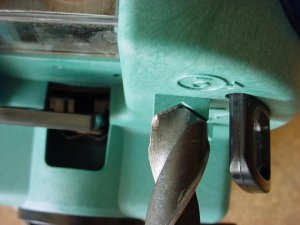 match up the angle of the bit |
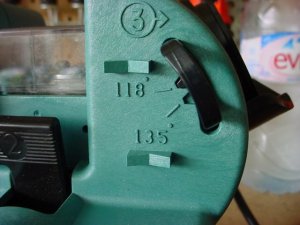 set the Angle Point Indicator |
Since I got the DD750 to sharpen my biggest bits, I figured I’d test it out on them first since they’re also in the worst shape, as you can see above. The first thing you need to do is set the point angle. The DD500 and DD750 can sharpen both 118* and 135* bits. One of my large bits was actually about 100*, but I’ll get into that more later. Using the angle guides on the front of the DrillDoctor, determine which angle your bit tip is and adjust the Angle Point Indicator to that setting by pulling towards you and sliding it up or down.
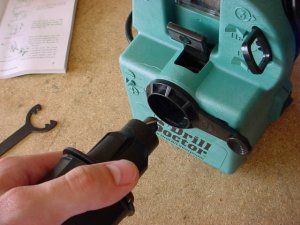 insert the chuck into the port |
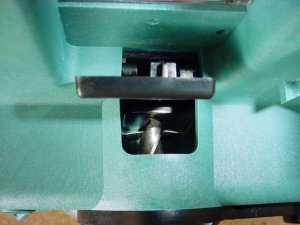 turn the bit until the clamps firmly grasp it |
Next, insert the drill bit into the appropriate chuck and tighten the chuck so it’s just snug enough on the bit to keep it in place but not so tight that you can’t move the bit inside the chuck (if that makes sense). Press back on the Alignment Paddle (the black tab above the front alignment port) to open the Bit Clamps inside, and insert the chuck into the port. Push the chuck forward into the port until the bit hits the stop inside and the chuck fits into the port (there are matching flats on the chuck and inside the port). Release the Alignment Paddle and rotate the drill bit until the Bit Clamps are holding the bit at its narrowest point (gets harder to turn the bit at this point). Tighten down the chuck on the bit, pull it out of the alignment port, and you’re ready to start sharpening!
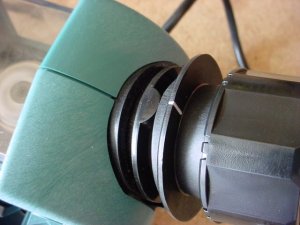 line up one of the white marks with the cam guide on top |
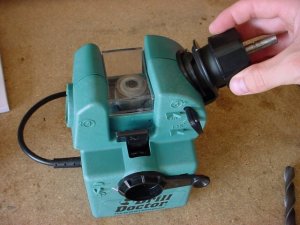 rotate the chuck clockwise and even number of half-turns |
Insert the chuck into the Sharpening Port, line up one of the two wire marks on the chuck with the cam guide on top of the port, and flip the power switch on the base of the unit below the Sharpening Port. To sharpen the bit, all you do is turn the chuck to the right an even number of half turns (each white tick mark is half a turn) — this ensures each side of the bit is sharpened the same amount. The larger the bit, the more half-turns you do (they recommend 16-20+ half-turns for larger bits). A high-speed diamond wheel at the center of the DrillDoctor does the sharpening duties.
The chuck has a dual-cam design, so as you turn it, it moves in and out of the Sharpening Port and it tilts up and down slightly. This somewhat odd combination of movements takes a bit to get the hang of, but once you’re used to it you can sharpen a bit pretty quickly and easily.
So I bet now you’re probably wondering how well this thing really works huh? Well, read on and find out!
Testing, split points, and new angles >>
Comments are off for this post


