 |
CJ/YJ/TJ HoodLift |
Installation date: 1/3/01
 Who wouldn’t want to be able to unlatch their hood and have it lift open and stay open all by itself? Sounds great doesn’t it? Especially if you’ve got a tall lift and big tires, that hood can open up pretty high… Enter the HoodLift® by Jim Piatt.
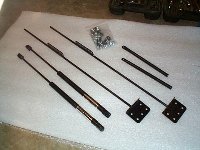
The HoodLift kit is really pretty simple, consisting of 2 adjustable support struts, 2 nitrogen-filled dampeners, and mounting hardware. At the time of this article the kit retails for about $125 through Quadratec or you can order it direct from Jim’s website.
Jim claims they can install the kit in about 20 minutes, but that it will take first-timers about an hour, which is about how long it took us to do the install, mostly due to clearance issues with the TJ’s wiper fluid reservoir which I’ll discuss later.
The instructions are really quite good, complete with lots of diagrams, so I won’t go into a lot of detail about the install. You’ll need to round up some common tools before starting the install, such as a drill, 1/8″ drill bit, 7/16″ wrench, and a phillips screw driver.
 |
 |
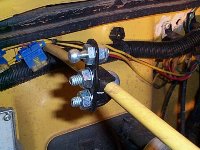
The first order of business is to bolt together the lower ball stud mounts. These go on the radiator brace rods, about 6″ from the firewall. The rods were a little big for the cast steel saddles, so when I tightened down the u-bolts the saddles cracked in half, but it worked out good because they now fit the rods much better.
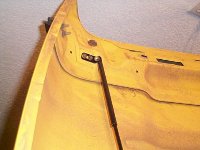
Next, install the upper right bracket. This is where TJ’s owners get lucky, because the HoodLift bracket bolts right where the OEM prop rod does. CJ and YJ owners aren’t so lucky, so they’ll have to do some marking and drilling.
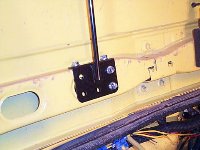 |
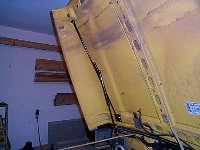 |
Now position the lower bracket as per the diagrams in the instructions and mark and drill 4 holes. Be careful not to drill through too far, you don’t want to dimple your hood!
The lower bracket actually has about 7 holes in hopes that at least 4 will overlap sheetmetal. As you can see, the TJ hood has some voids that keep some mounting holes from being used (good thing Jim already solved this problem!).
You’ll want to install the support rods so that the tab that the gas struts mount to is between the rod and the hood. This is what it should look like once one side is done and the gas strut is clipped on.
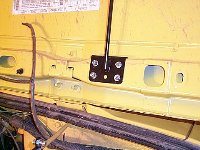 |
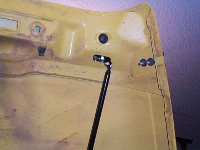 |
The lower left bracket had more sheetmetal under it, so we were able to use the recommended mounting holes. Again, be careful not to push through too far with the drill and dimple your hood. Also, you don’t want to over tighten the sheet metal screws that hold the brackets on, otherwise you could strip the holes (another reason you have 7 holes to choose from, in case you mess up a couple!).
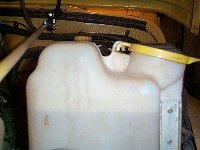
The top left bracket was the trickiest of the 4 to position, due to the support brace hitting the washer fluid reservoir when we closed the hood. Good thing we checked clearances before drilling! It took a bit of playing around, but we were finally able to position is so that the brace came down between the cap and the hump on the left side of the reservoir…
Now that the brace was hitting the reservoir where we wanted, it was time to clearance the reservoir itself. Some creative use of a Dremel took out enough plastic from the “web” on the top of the reservoir to keep the brace from hitting while still retaining the “hinge” for the cap.
 |
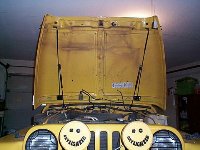 |
The final product! Once everything was bolted up and ground down for clearance we adjusted the gas struts so they opened the hood to approximately the same position as the OEM prop rod. The support braces have multiple mounting positions for the upper strut ball stud mount so you can have the hood open higher or lower than stock. Now, all it takes to open the hood is to pop the latches on the outside, pull the lever in the grill and lift the hood a couple of inches, after that, the gas struts take over and lift the hood to a smooth, cushioned stop at the top. The radiator support rods flex just a bit, so the hood bounces just slightly after the gas struts stop, nothing to worry about though.
Closing the hood is easy as well. The struts provide good resistance, but it only requires one hand to pull the hood down. After the hood is within a couple of inches from shutting, it will come down by itself. If you need to open the hood all the way and lean it on the windshield, simply unclip the struts from the support braces and lay the hood back (don’t forget to reclip the struts before closing the hood!). If you have any questions or comments during the install or afterwards, Jim includes his phone number and web address so you can contact him directly.
All in all, this is one awesome product, and we can’t say that about all the products we’ve tried out. We’ve had it in use for a couple of months now with no problems or complaints, and even some of the service guys at the local dealer have complimented us on the kit. Now if Jim would only make a kit for XJ’s!!
For more information, contact:
| Quadratec, Inc 1028 Saunders Ln West Chester, PA 19380 1-800-745-5337 fax: 1-610-701-2402 http://www.quadratec.com |
Jim Piatt 3109 Alder Way West Sacramento, CA 95691 1-800-579-3024 http://www.hoodlift.com |


