 |
Rock Lizard Fabrications’ Gila Monster Quarter Guards |
Installation date: 11/19/2004
Editor’s note: Rock Lizard Fabrications is no longer building XJ products. Similar quarter panel armor is currently available from C-ROK Engineering.
One of the areas on our XJ I felt had always needed some protection was the lower rear quarter panels behind the rear wheels. XJ’s have a fairly decent rear overhang (compared to SWB Jeeps) and those lower rear panels have a nasty habit of getting smacked on things, especially if you’re running smaller lifts and tires (or if you play in big rocks). I’d hadn’t done any serious damage to mine yet, but I’d racked up enough minor scrapes and dents to want to get some armor on there.
Some folks opt to simply cut the area off and box it in, which can look cool and certainly takes care of the clearance issue, but I didn’t want to do anything that “drastic” and having very little welding experience, it wasn’t really within my capabilities at the time anyway. I’d been looking at a few different choices and was about to get a set of guards from Greg at C-ROK Engineering when Marty over at Rock Lizard Fabrications debuted his new Gila Monster Quarter Guards. A good friend of mine had the C-ROK guards and they’re really nice, so it was a hard choice to make. Both guards are made of 3/16″ steel and both covered the entire lower guard panel and wrapped around the bottom (something I was really wanting), but in the end I simply liked the counter-sunk mounting bolts on the RLF guards better than the button-head bolts used by C-ROK. The C-ROK panels use a nut-strip inside the fender for the mounting bolts though, which should make installation a bit quicker and easier than the RLF panels.
The RLF panels come powder coated and mount to the quarter panels using eight 3/8″ zinc-plated countersunk bolts with washers and locknuts. The Gila guards are available for all XJ’s, and can be ordered to fit with or without the factory flares. Since I’ve got Bushwacker flares, I opted for the “full length” guards and decided to modify my flares to fit (I’ll cover that part at the end of the write-up).
Like all of RLF’s products, the instructions are great, even though putting these things on really isn’t rocket science. It does help to either have skinny hands and wrists or someone to help you, because getting to all the bolts on the driver’s side panel can be a bit of a pain because of gas tank filler neck. Since the passenger side is the easier side to install, that’s where I started.
Before you get started on the install, you’ll need to remove your flares (depending on which version you get), remove any trim pieces from the quarter panel (they can be pulled off by hand), and clean off any dirt, glue residue, etc from the quarter panels. I’d long since pulled off the trim pieces and cleaned up and painted my lower quarter panels, so that part was all already done.
 |
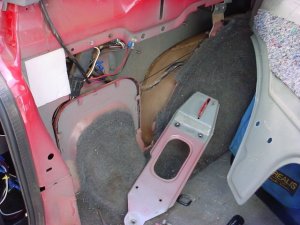 |
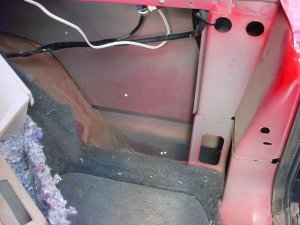
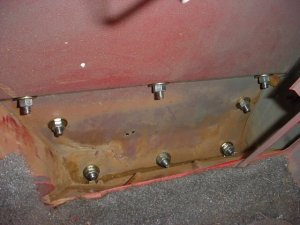
Once you’ve got the outside of the quarter panels prepped, it’s time to remove the plastic trim panels from the sides of the cargo area, that way you can get to the back of the bolts to put on all the washers and nuts. On the driver side you’ll want to unbolt and pull out the support brace for the spare tire mount. It comes off pretty easily after you remove the four 10mm bolts that hold it in place (one on top, two on the “front”, and one at the bottom). I also found it really helpful to pull off the tail light on the driver side too because you can use that space to get to the rear mounting bolts for the guards.
 |
 |
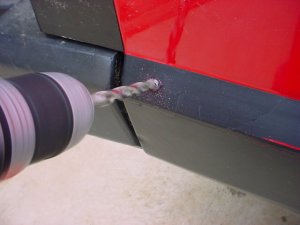
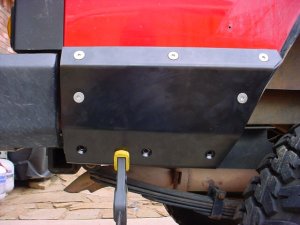
Next, position the Gila guard on the quarter panel and mark the top rear bolt hole. Set the guard aside and break out the drill and a 3/8″ bit. Once the hole is drilled, put the Gila guard back into place and put in one of the countersunk mounting bolts. The bolt doesn’t have to be super tight, just snug enough to hold the guard in place. At this point I swapped the supplied locknuts for some regular nuts to make things go quicker since you’ll probably be taking all the bolts out again once you’ve got all the holes drilled.
 |
 |
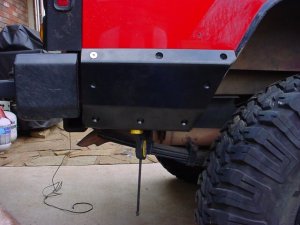
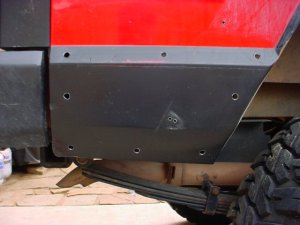
With that first bolt in place, press the guard against the body and mark and drill the remaining 7 holes, going from left to right and top to bottom, putting in mounting bolts as you go. Here’s where it’s handy to have an extra set of hands helping — that, or a barclamp or two.
 |
 |
Once you’ve got all the holes drilled, it’s a good time to pull everything back off, clean up the holes if they need it, and give the quarter panel and holes a quick coat of paint. Just ignore the two little holes in the middle of the quarter panel, that was one of my screw-ups while installing the Bushwacker flares…
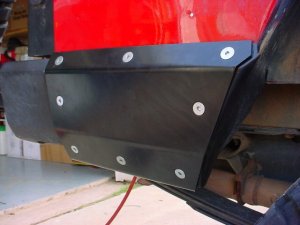 |
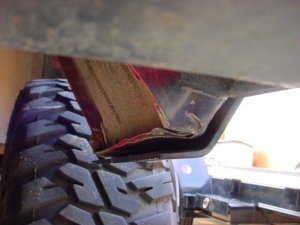 |
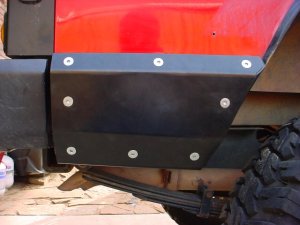
Once the paint is dry, bolt the Gila guards back into place and tighten down all the bolts. The finished product looked great, and fit the body lines perfectly. As you can see in the photo above on the right, the Gila guards wrap under the quarter panels nicely to protect the bottom pinch seam.
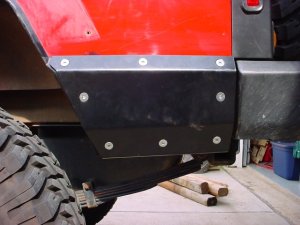 |
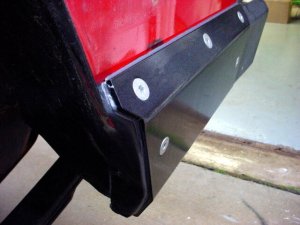 |
In order to help keep water and debris from making their way behind the Gila guards, I ran a bead of black silicon along the top, front, and rear edges of the guards. I left the bottom edge “open” so that if any water did manage to get behind the guards, it could drain out. You could also run a bead along the back of the guards and around the bolt holes before putting them back on, but I didn’t feel that was really going to be necessary.
 |
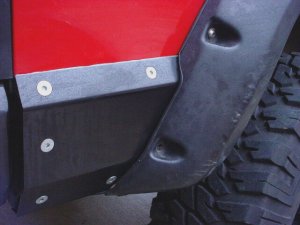 |
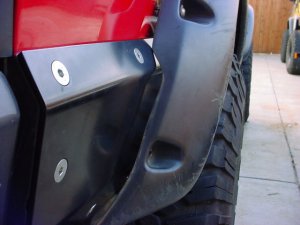
If you’re using aftermarket flares, like Bushwackers, you’ll probably have to trim the flares a bit to get them to fit over the Gila Guards correctly. I’d hoped since the guards were only 3/16″ that my Bushwackers would still just fine, but as you can see above on the left, I had no such luck. The solution was to simply trim off about 3/16″ of the flare’s lip using a utility knife. The plastic is relatively easy to cut, and the rubber edge guard had created a nearly perfect cutting guide for how much to trim off. With a little trial and error at the fitment, the final result fit better than the Bushwackers did originally. If you also notice above, the lower mounting bolt is missing. I decided not to drill the Gila panels for that lower bolt because I figured the guards would outlast the flares, and the “strength” of the flares didn’t seem to be affected by not having that last bolt.
For more information, contact:
Rock Lizard Fabrications
http://www.rocklizardfabrications.com/
rocklizardfab@sbcglobal.net
(316) 776-9911


