


 |
OYR Corner Guards and LEDs |
The rear corners on a TJ are relatively vulnerable, and while we hadn’t yet managed to mangle ours, we decided it was time for some armor. Plus, diamond plate corner guards and flush mount round tail lights just look cool. Deciding exactly what we wanted was easy – black steel diamond plate corners from Off Your Rocker and a set of 4″ round LED tail lights. OYR is synonymous with heavy-duty steel diamond plate armor, like Currie and Ford 9″ axles or Dynatrac and custom Dana axles, so going with them was a no-brainer. There are other companies that sell corner guards, but OYR had the best reputation and you could get corners custom cut for you choice of tail light configurations.
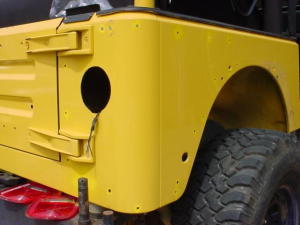
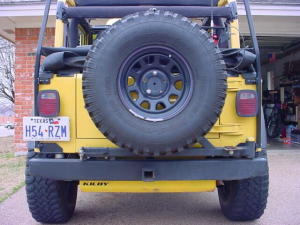 Before… |
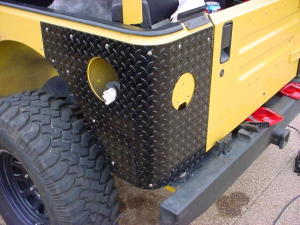
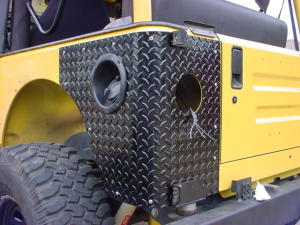
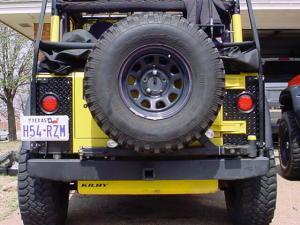 …and After! |
A call to James over at JeepersAndCreepers secured the OYR corners for us. We told James we wanted our corners cut for 4″ round lights and he said no problem, he’d have OYR make our corners with cutouts for 4″ round lights. The OYR corners also come with cutouts for the gas filler hole and tailgate hinges.
We went with LEDs mainly because we liked how they looked, but they aren’t exactly cheap compared to standard 4″ halogen trailer lights. We’d seen a few rigs with different tail light configurations, but we just liked the classic 4″ round lights the best, they give the Jeep a bit more retro look. We searched around a bit looking for the best prices on LED lights and finally came across PartsSystems.com. They had the cheapest prices we’d found so we ordered a pair of Maxxima brand LEDs, pigtails, and grommets and got them all for about $55 shipped. Not bad for LEDs!
The flush mounted lights have no way of lighting up the license plate, so we had to find some other way of doing it. That’s where Rockcrawler.com comes in. RC has an article about installing some OYR corners and LEDs on a TJ and the author used a set of trick Lite-N-Boltz from CBRack.com to light up his plate. Lite-N-Boltz are 5/16×3/4″ stainless steel bolts that have been center-drilled and machined to mount a small halogen bulb and wiring in the bolt head. This was exactly what we were looking for! Incidentally, we used the RC article as a guide while installing our own corner guards. Anyway, we got in touch with Doug Chartier over at CBRack.com (who’s also from Texas) and had him send us a set of Lite-N-Boltz.
For the back-up lights, we planned to use a set of cheap driving lights (the same lights we used as for our rocklights) wired into the OEM harness and mounted to the tire carrier.
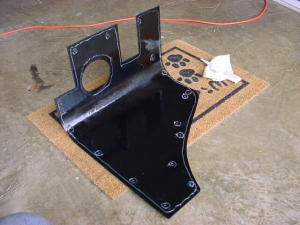
Once everything arrived, it was time to set about installing it all. The OYR corners are super beefy, made from 1/8″ (10-guage) steel, and came pre-drilled with two centering holes, in addition to the cutouts for our lights, fuel filler, and hinges.
 hmm, kinda dirty under there… |
 clamped on, lined up and ready to drill! |
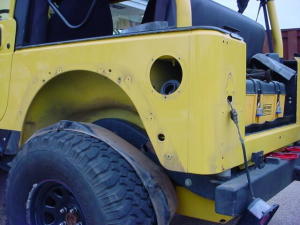
The first order of business is to remove the flares, plastic fender liners, tail lights, license plate bracket, and gas tank filler ring. You’ll also want to have your top off. Put the guards on the corners, line up the top edge of the panel with the bottom of the soft top mounting rail, and clamp them into place. Now you can drill the two alignment holes in the tub and mark for your new tail light cutouts on the tub (if you’re doing that).
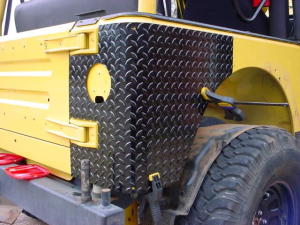
 the left… |
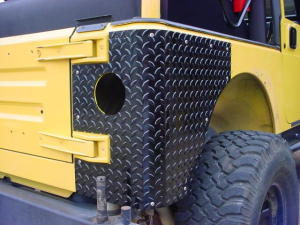
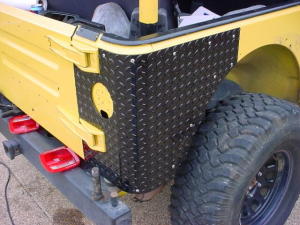 …and the right bolted on |
The panels come with enough bolts to put 15 bolts per side, so take some time to figure out, measure, and mark where you want all the bolts. Be sure you locate the holes where you can easily access the back so you can put the nuts and washers on the mounting bolts. Now drill out all the holes using a ¼” drill bit (this proved to be the most time-consuming part of the install). We ended up only using 14 bolts per side.
Three of the flare mounting holes will be covered by the panels, as well as the holes for the fuel filler neck. With the corner securely in place, mark these holes on back of the panel with a scribe or some sort (I think I used a nail), then remove the panel and drill out these holes. You’ll also need to enlarge the three holes in the body since the panels use ¼” bolts.
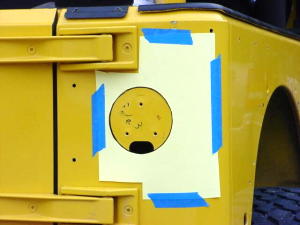 the body is marked and taped, now where’s that saber saw? |
 there’s no going back now… |
Now it’s time to cutout the holes for the new tail lights. Since we ordered our panels pre-cut for the lights, all we had to do was cut the holes in the tub – which was good considering how tough those panels are, I thought I was going to wear out my drill bit drilling all those holes! Mark the tub where the cutouts need to be and pull the panels back off. We made some paper templates for the holes to keep from scuffing the paint while we cut. Our handy-dandy little saber saw made short work of the sheetmetal.
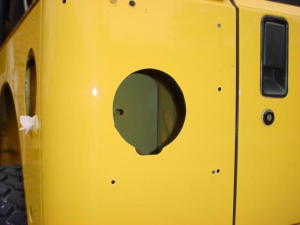
 primer all the holes and cuts, don’t want rust starting under there |
 is this what putting icying on a cake is like? |
De-burr the holes and tail light cutouts and clean any dirt or grim off the body if you haven’t already. You’ll probably want to prep the bare metal with some paint to ward off rust. We used some yellow Krylon spray paint so it would match the OEM paint, but the panels will cover up all the holes, so it doesn’t’ matter what color you use. Clean up the inside of the panels and run a bead of silicon around the outer edge and around all the holes and cutouts, this will help keep dirt from getting down in between the panel and the body.
Place the panels carefully back on the body and bolt them down. Reattach the fuel filler neck and any extra brackets you may have (we had to drill extra holes for our Garvin safari rack’s mounting brackets). You can also put the flares back on now if you want.
 |
 |