


 |
Rubicon Express 5.5″ Extreme Duty XJ kit |
Installation date: 11/02
Introduction | Rear Install | Front Install | Testing and Conclusions
Somewhere along the line during the install on the back end you’re going to need to put in the extended rear stainless brakeline that comes with the kit. I installed one on my rig long ago, so I don’t have any photos of the process. I’d recommending installing the brakeline before you install the rear lift, I think it would just make life easier to have that done before hand. Be sure you use a flare nut wrench to loosen the flare nuts on the hardlines (same goes for the front brakelines), that way you won’t strip the nuts out trying to get them loose. And trust me, you don’t want to strip one of those nuts out, because it’s not fun having to try and get it loose with some vise grips then have to go and cut the line, buy a new nut, and flare it on… Once you get the new line on, bleed the brakes as normal. If you’re not already familiar with how to bleed brakes, buy a bleeding kit from your local auto parts store and pick up a Chilton’s or Haynes service manual (or better yet a Factory Service Manual – FSM) if you don’t already have one.
 |
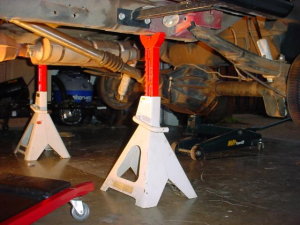 |
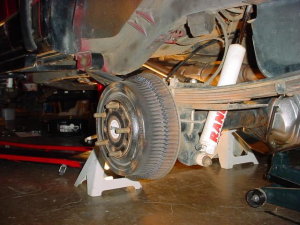
The back end is your standard leaf spring and shackle swap. You’ll want to start by chocking the front tires and jacking up the rear end and supporting the body with a pair of 6-ton jackstands. I always place my jackstands under the frame rails, just ahead of the front leaf spring hangers.
 |
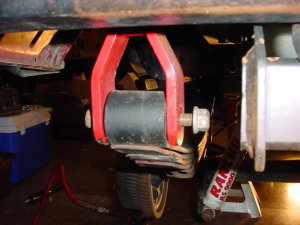 |
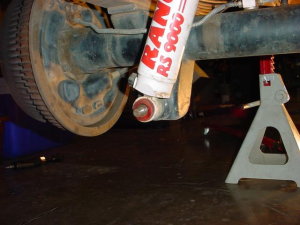
With the rear axle still supported by your floor jack, remove the u-bolts and spring plates. You’ll also want to loosen the bolts connecting the leafs to the shackles at this time, as well as unbolting the shocks from the axle mounts.
 |
 |
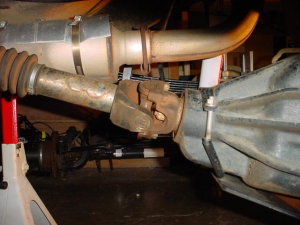
Depending on you current setup as far as your driveshaft, brakelines, etc goes, you may or may not need to unbolt these as well. Since I was replacing an existing lift, I already had an SYE and extended brakelines and breather hoses. With the axle complete unhooked from the body, lower it down. Now finish unbolting the leaf springs and shackles and pull them out.
If you got shims with your kit, go ahead and install them on the bottom of the leaf packs before you put the leafs in. Don’t worry about needing to clamp the leafs when you loosen the center bolt, all the leafs have the same arch to them so there’s no “tension” on the pack when it’s sitting on the ground. You may need to drill out the holes in the shims one size larger to fit the center bolts in the leafs, I did.
 |
 |
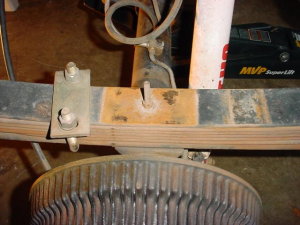
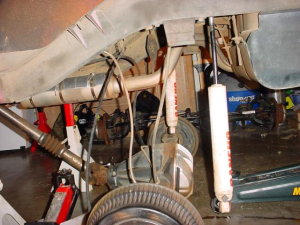
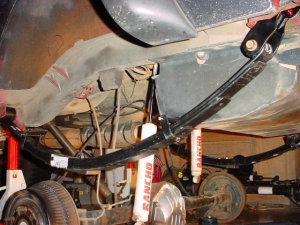
Now take the new leafs and shackles and put them in place of the ones you just pulled out. The shackles need to be installed so that the crescent cut-outs are facing to the rear. You’ll want to go ahead and grease the shackle bushings really well now, because for some reason the zerk fittings are pointed backwards, making it nearly impossible to get to them with weight sitting on the springs.
Leave all the leaf spring and shackle bolts a little loose until you get the axle bolted back up and weight sitting on the springs – you don’t want to torque these bolts until everything is sitting in its at-rest position.
 |
 |
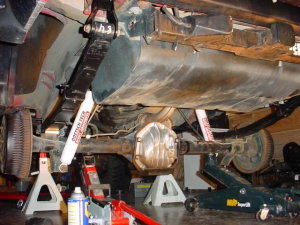
Raise the axle back into place and bolt it to the new leaf springs using the supplied u-bolts and nuts. The u-bolts are pretty long, but you can cut off the excess if you want. I left mine long in the event that I decide to add some 1” blocks in the future for a little more lift. At the recommendation of Dirk of DPG Off-Road, I had RE substitute a set of 4* steel shims in place of the 1” transfer case drop that comes standard with the kit. The shims set my pinion angle nearly perfectly for an SYE and the amount of lift the kit gives.
With everything in place and bolted in, jack the back end up again, put the wheels on, pull out the jack stands, and set it back on the ground. Now you can go back and torque the leaf spring and shackle bolts to 65 ft-lbs.
Now let’s move on to the front half…
3 comments3 Comments so far
Thanks for this post – I am looking for a lift at about this height. I have a 3” pro comp lift currently, and I have an SYE and custom driveshaft already installed. What I am wondering is what other things I will need to do (besides purchasing a kit like this) to run 35s. I know I will need to regear, but what about brakes, brake lines, possibly a longer rear drive shaft?, better steering components, shocks, steering stabilizer, etc. Thanks a lot.
-Bobby
Any lift kit of this height will come with all the suspension related components you’ll need, including brakelines, swaybar disconnects, etc. Depending on the brand, the kit may or may not come with shocks (if it doesn’t include shocks standard, you’ll need to get some). You’ll also need an SYE and CV driveshaft, but you’ve already got those.
Gears are a must. If you’ve got a D35 or a 27-spline Chrysler 8.25″ rear axle you’ll need to swap those out as well. (The 27sp C8.25 can be upgraded to 29-splines).
Steering just depends on the condition of your current parts. If you’re still running all stock steering I’d recommend at least upgrading to a heavy-duty tierod if you wheel the Jeep at all, regardless of tire size.
[…] and wanted something stiffer than the DT3000s I’d been running since I first installed my RE 5.5″ kit. Bilstein’s 5150s fit the bill with firm valving, a fixed cross-flow remote reservoir to […]