Installation date: 10/16/99
Installation continued:
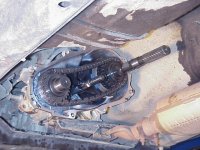 |
This is what the t’case will look like after removing the rear half. I got lucky and had all the silicon sealant come off on the rear half, so I didn’t have to worry about cleaning the front half of the t’case. You can see bits of the silicon still left over though.
Pull the spring off the shift rail and set the spring aside. |
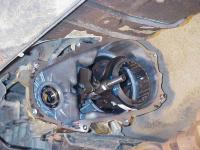
| Now slide the front and rear output shafts out of the t’case, the chain will come out with them. You can remove the shift ring with the main output shaft, or leave it in the t’case. I figured it would be easier to just leave it in. You can see the shift ring still in the t’case in this picture. |
 |
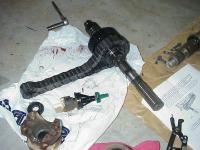 |
This is the main output shaft and chain. You can also see the speedo gear housing and front yoke. There is a large lockring on the front of the main output shaft. This must be removed so you can remove the synchronizer from the output shaft. This is where the very large lockring pliers come in handy. |
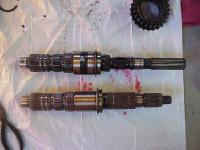
| Here are the two output shafts side by side. The bottom one is the new JB output shaft. Notice the difference in diameters between the two output shafts. According to JB’s website, their new output shaft is 54% stronger than stock. |
 |
 |
Unfortunately I didn’t get any photos from pressing the new bearings into the synchronizer, but the JB instructions have good diagrams showing what to do and how far to press them in.
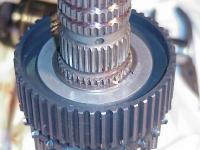
Here you can see the synchronizer, washer/shim, and large lockring reinstalled on the new output shaft. |
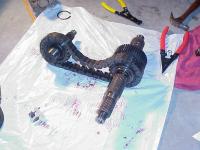
| Lube the new output shaft with some ATF, then put the output shafts back in the chain as shown, and slide the assembly back into the t’case. |
 |
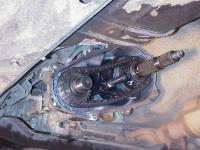 |
This is what it should look like once you get the output shafts and chain reinstalled. Be sure to put the spring back on the shift rail.
At some point you will need to clean all the old silicon off the two t’case halves so that you can seal them back up. If you have silicon on the front half of the t’case, I would recommend cleaning it off while you have the chain and output shafts out so you don’t get silicon flakes all over them. I used a round stiff wire brush on a drill to take the silicon off. It took a while, but worked very good and didn’t scar the surfaces. |
| Once you get all the old silicon off, you can apply new gasket maker. I used UltraBlue RTV Gasket Maker and it seems to be working very well.
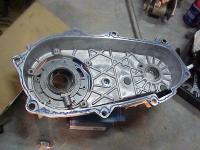
In this shot you can see the back of the oil “pump” and its pick-up tube. Make sure you get the pump and pick-up tube lined up correctly before reinstalling the rear half of the t’case and sealing everything back up. I had some trouble getting the pump to slide over the new output shaft, so make sure you’ve lubed the new shaft up well with ATF. |
 |
Finishing it up…
Pages: 1 2 3 4


[…] http://www.yuccaman.com/jeep/porc_sye.html http://www.links4jeeps.com/writeups/231sye/3.php http://jeepin.com/features/sye And as the others before said, there's no putting a body lift on an XJ, unless you cut the body […]
[…] http://www.yuccaman.com/jeep/porc_sye.html http://www.links4jeeps.com/writeups/231sye/3.php http://jeepin.com/features/sye It isn't too complicated. Just pay attention to where everything goes. Don't lose the o-ring that […]
[…] http://www.yuccaman.com/jeep/porc_sye.html http://www.links4jeeps.com/writeups/231sye/3.php http://jeepin.com/features/sye The rest wasn't too complicated. Took me several hours, but I was taking my time trying to be […]